Making sushi at home starts with perfectly cooked rice. Boiling it on your stove gives you more control than you might expect.
A lot of folks think you need fancy gadgets, but honestly, a regular pot and good technique will do the trick. That sticky, slightly sweet rice that holds sushi together? Totally doable.
To boil rice for sushi, rinse short-grain Japanese rice until the water runs clear. Combine it with water in a 1:1.25 ratio, bring to a boil, then simmer covered for 15-20 minutes, and let it rest for 10 minutes off the heat.
Once cooked, season the rice with a mix of rice vinegar, sugar, and salt to get that authentic sushi taste.
This guide covers each step, from picking the right rice to avoiding those annoying mushy or dry disasters. You’ll see how to prep, cook, season, and store sushi rice, so you can make restaurant-style sushi at home.
Key Takeaways
- Use short-grain Japanese rice and rinse it thoroughly before cooking to remove excess starch.
- Cook rice with a 1:1.25 rice-to-water ratio and let it rest covered for 10 minutes after cooking.
- Season the cooked rice with a mixture of rice vinegar, sugar, and salt while it’s still warm.
Selecting the Best Rice for Sushi
The rice you pick really shapes your sushi’s texture and taste. Short-grain Japanese rice, like Koshihikari, creates that sticky consistency sushi needs.
Other types of rice just don’t cut it.
Types of Sushi Rice
Sushi rice means short-grain Japanese rice, also known as Japonica rice. It’s nothing like the long-grain rice you use for other meals.
These grains are short, plump, and rounded. They’re not long and skinny.
Short-grain white rice packs more starch than other rice types. That starch is what makes the rice stick together without getting mushy.
Shops might label it as “sushi rice” or “Japanese short-grain rice.” It’s all the same stuff.
If you see rice marked for sushi, you’re on the right track.
Recommended Varieties and Brands
Koshihikari is the gold standard for sushi. It’s from Japan and has just the right balance of stickiness and firmness.
The grains look almost translucent and pearly when fresh. Kind of beautiful, honestly.
Calrose is another solid choice, especially outside Japan. It’s similar to Koshihikari and usually costs less.
If you’re new to sushi-making, Calrose is a forgiving option.
When you buy rice, check the grains through the packaging. Good rice looks uniform in size and color.
Skip any rice with broken grains or a chalky look. That usually means it’s old or handled poorly.
Why Short-Grain Rice is Essential
Short-grain rice works because of its unique starch makeup. High amylopectin gives it that sticky texture sushi needs.
Long-grain rice just doesn’t have it. It won’t hold together.
The shape helps too. Short, compact grains soak up water evenly, so you get the same texture throughout.
That’s crucial for rolling sushi and shaping nigiri.
Using the wrong rice? Your sushi will just fall apart. Only short-grain Japanese rice gives you the real deal texture and taste.
Essential Equipment and Tools
The right tools help you get the texture and flavor you want. They make it easier to control temperature, cool the rice, and mix in the seasoning gently.
Rice Cooker Versus Stovetop Methods
Rice cookers give you reliable results with barely any effort. They keep the temperature just right and switch to warming when they’re done.
Most newer rice cookers even have a sushi setting. That tweaks the water absorption and temp for you.
Stovetop cooking gives you more hands-on control, but you have to watch the timing and heat. You’ll want a heavy-bottomed pot with a tight lid to hold in the steam.
The pot should be big enough for the rice to expand. You don’t want it bubbling over.
Both methods can make great sushi rice. Rice cookers are great for beginners or if you’re busy.
Stovetop is nice if you like doing things the old-school way or don’t have space for another appliance.
Using a Sushi Oke or Hangiri
A sushi oke (or hangiri) is a wide, shallow wooden tub for cooling and seasoning rice. The wood soaks up extra moisture, and the big surface helps the rice cool fast.
That keeps the grains from getting mushy.
Spread the rice in a thin layer, about 5-7 centimeters deep. You can fold in the vinegar without smashing the grains.
Before using a hangiri for the first time, soak it in water for 30 minutes. That keeps the rice from sticking.
No hangiri? Use a large, shallow glass or ceramic bowl. Steer clear of metal bowls—they keep too much heat and can react with the vinegar.
Choosing the Right Rice Paddle
A wooden rice paddle (shamoji) is the way to go for mixing and serving. Wood doesn’t get hot, so it won’t warm the rice as you work.
The flat, broad shape lets you mix gently without smashing the grains.
Bamboo and cypress paddles don’t stick much. Soak your paddle in water before using it to help keep rice from sticking.
Plastic paddles work too. They’re easy to clean and don’t need soaking, but they don’t soak up moisture like wood.
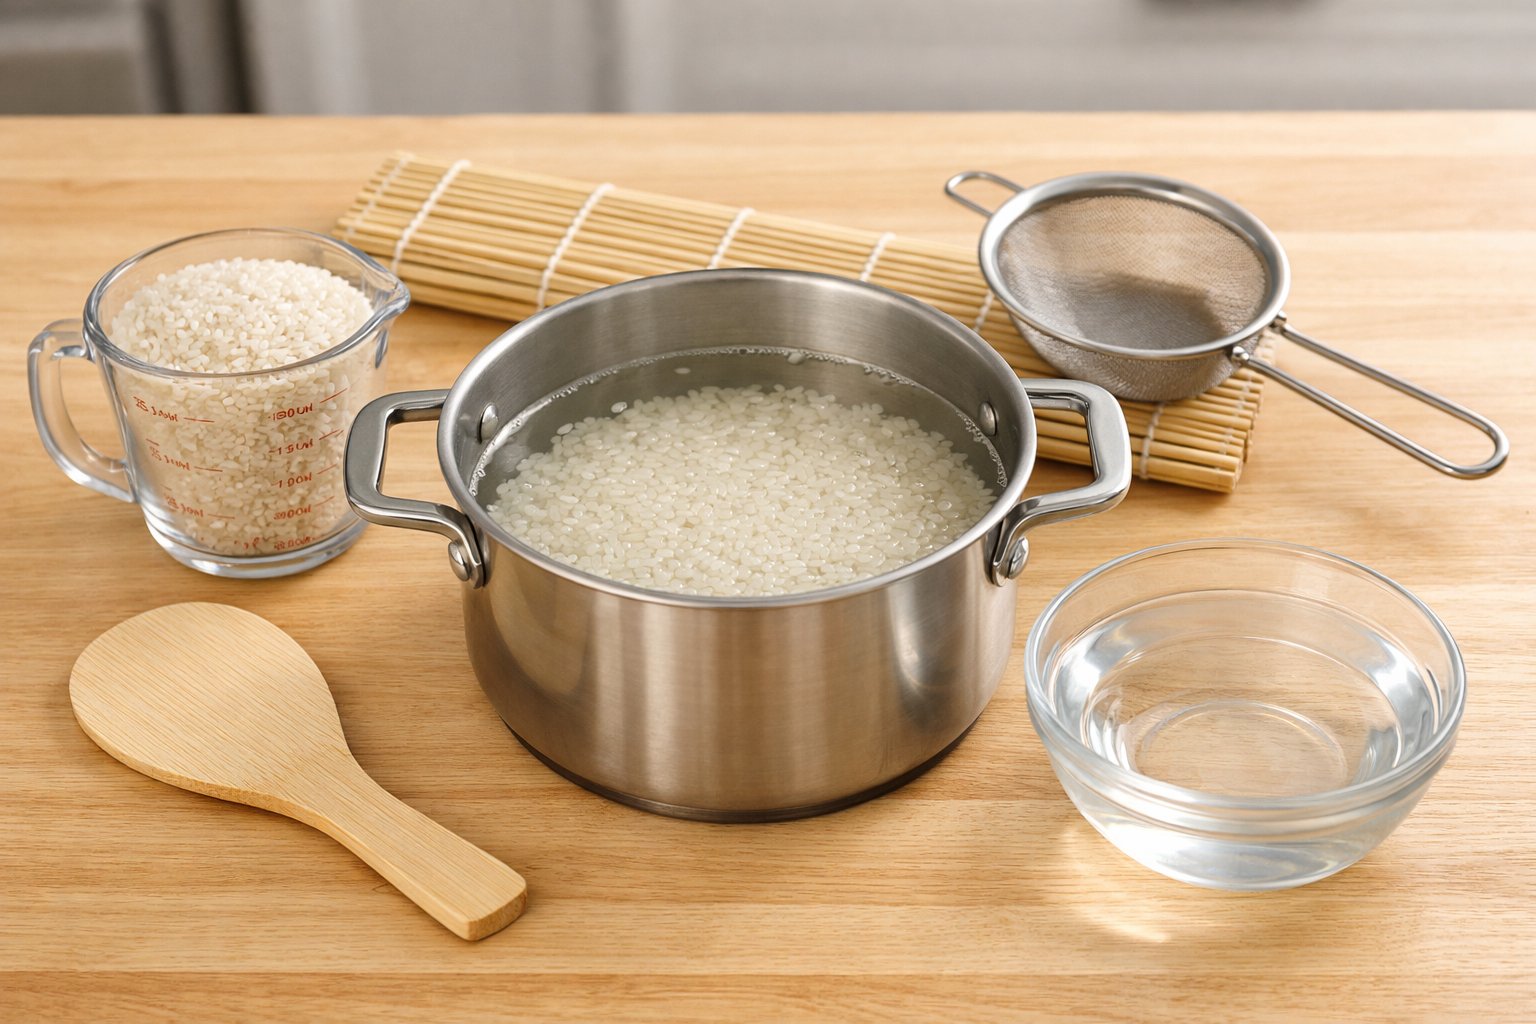
Preparation Before Boiling
Getting the rice ready is key for the right texture and flavor. Rinsing and soaking help remove extra starch and let the grains absorb water evenly.
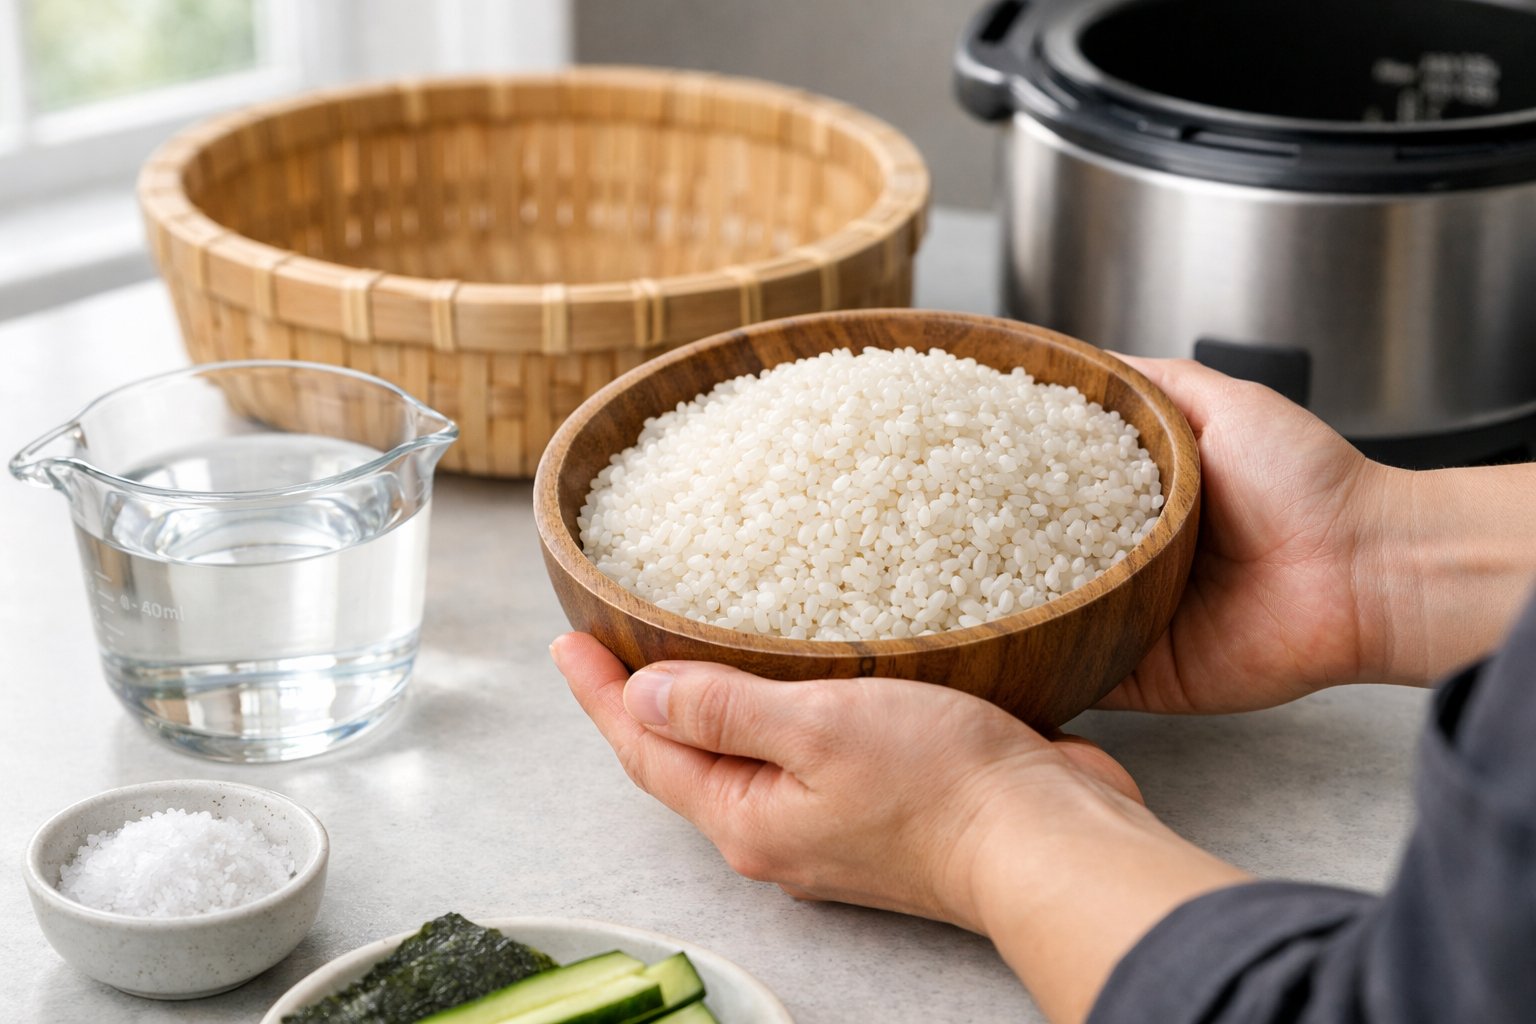
Measuring and Rinsing the Rice
Use a standard rice measuring cup (180ml) for accuracy. A 1 cup rice to 1¼ cup water ratio is pretty reliable for most sushi rice.
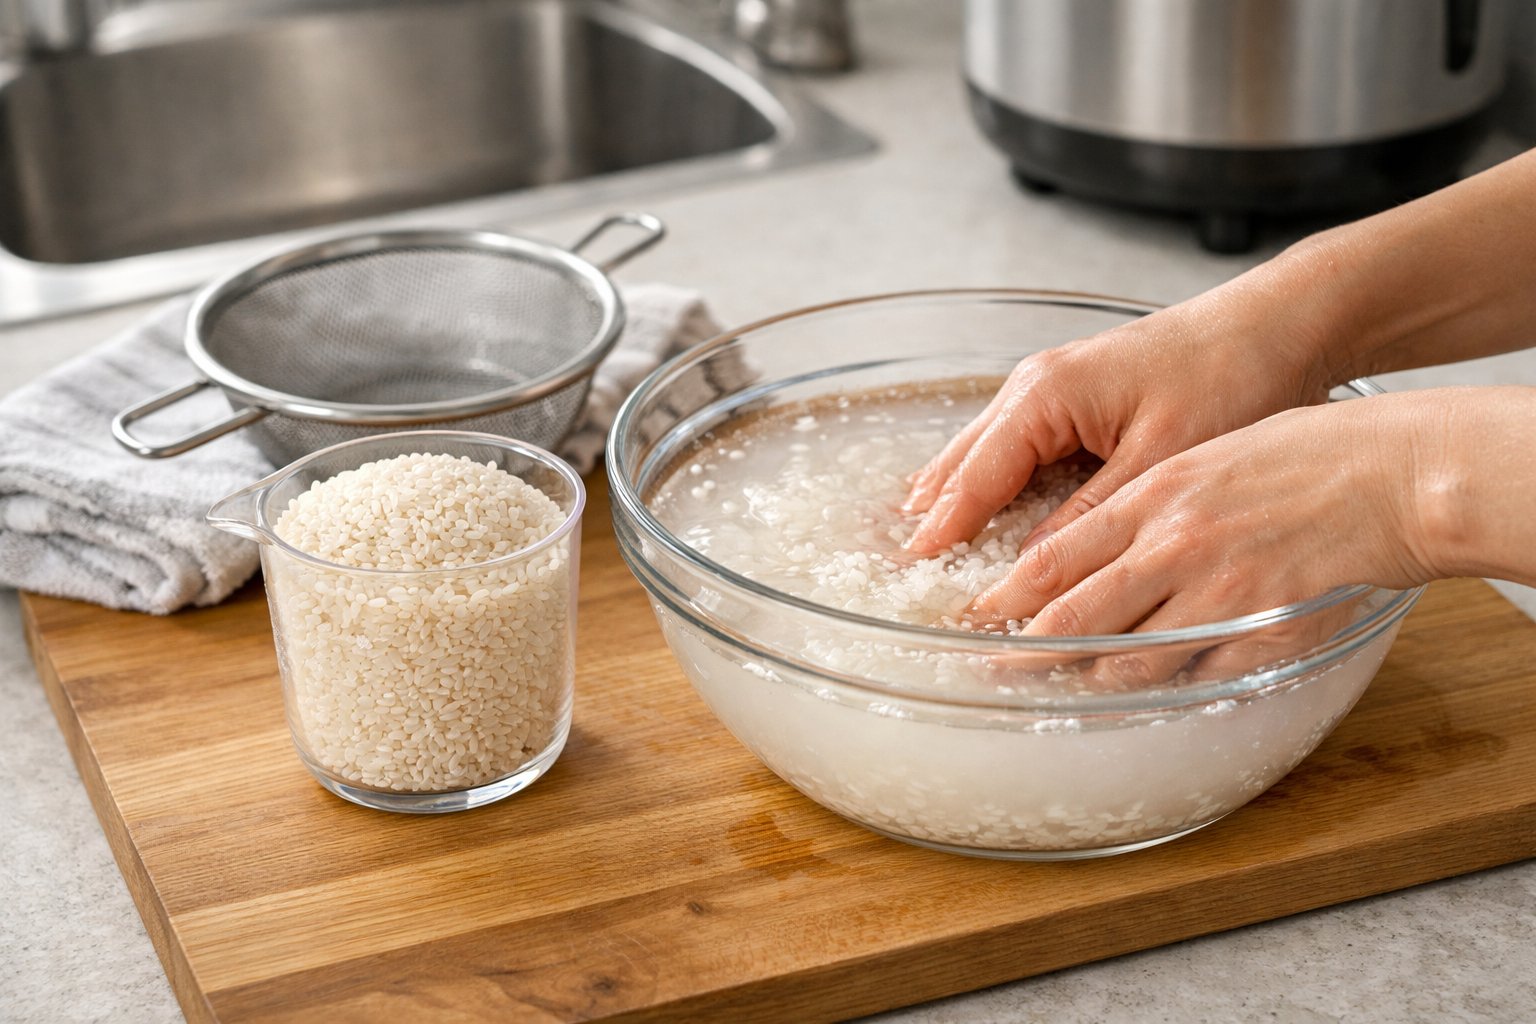
Put the rice in a big bowl, cover with cold water, and gently rub the grains in circles. The water will turn cloudy as the starch comes off.
Drain the water and repeat. Usually, you’ll need to rinse 4-5 times until the water is almost clear.
This step is huge. It keeps your cooked rice from turning into a sticky mess.
If you skip rinsing, your rice will clump too much. Proper rinsing lets you fluff the rice later without it going mushy, which is what you want for sushi.
Soaking and Drainage Techniques
After rinsing, let the rice soak in fresh cold water for 30 minutes. This helps the grains soak up moisture evenly.
Soaking makes the center of each grain tender, while the outside stays structured.
If you skip this, you might get rice that’s mushy outside but hard inside.
Once soaked, drain the rice using a fine-mesh sieve. Let it sit in the sieve for 10-15 minutes to get rid of extra water.
This keeps you from adding too much water during cooking, which could ruin the texture of your sushi rice.
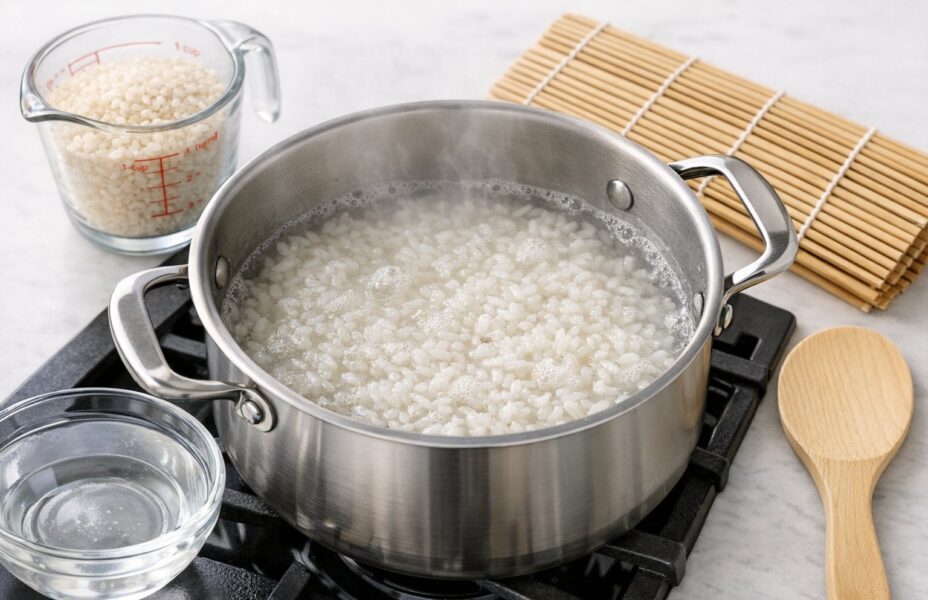
How to Boil Rice for Sushi on the Stovetop
Boiling sushi rice on the stove means you need to be precise. The right water ratio and timing make all the difference.
Rice-to-Water Ratio and Timing
Use a 1:1 ratio of rice to water for stovetop sushi rice. For 2 cups of rinsed rice, add 2 cups of fresh water to your saucepan.
This ratio works because sushi rice absorbs a lot of water during rinsing and draining.
The whole process takes about 30 minutes. That’s 20 minutes of cooking and a 10-minute rest after turning off the heat.
Pick a medium saucepan with a tight lid. The lid needs to seal well to trap steam.
Make sure the pot is big enough for the rice to expand.
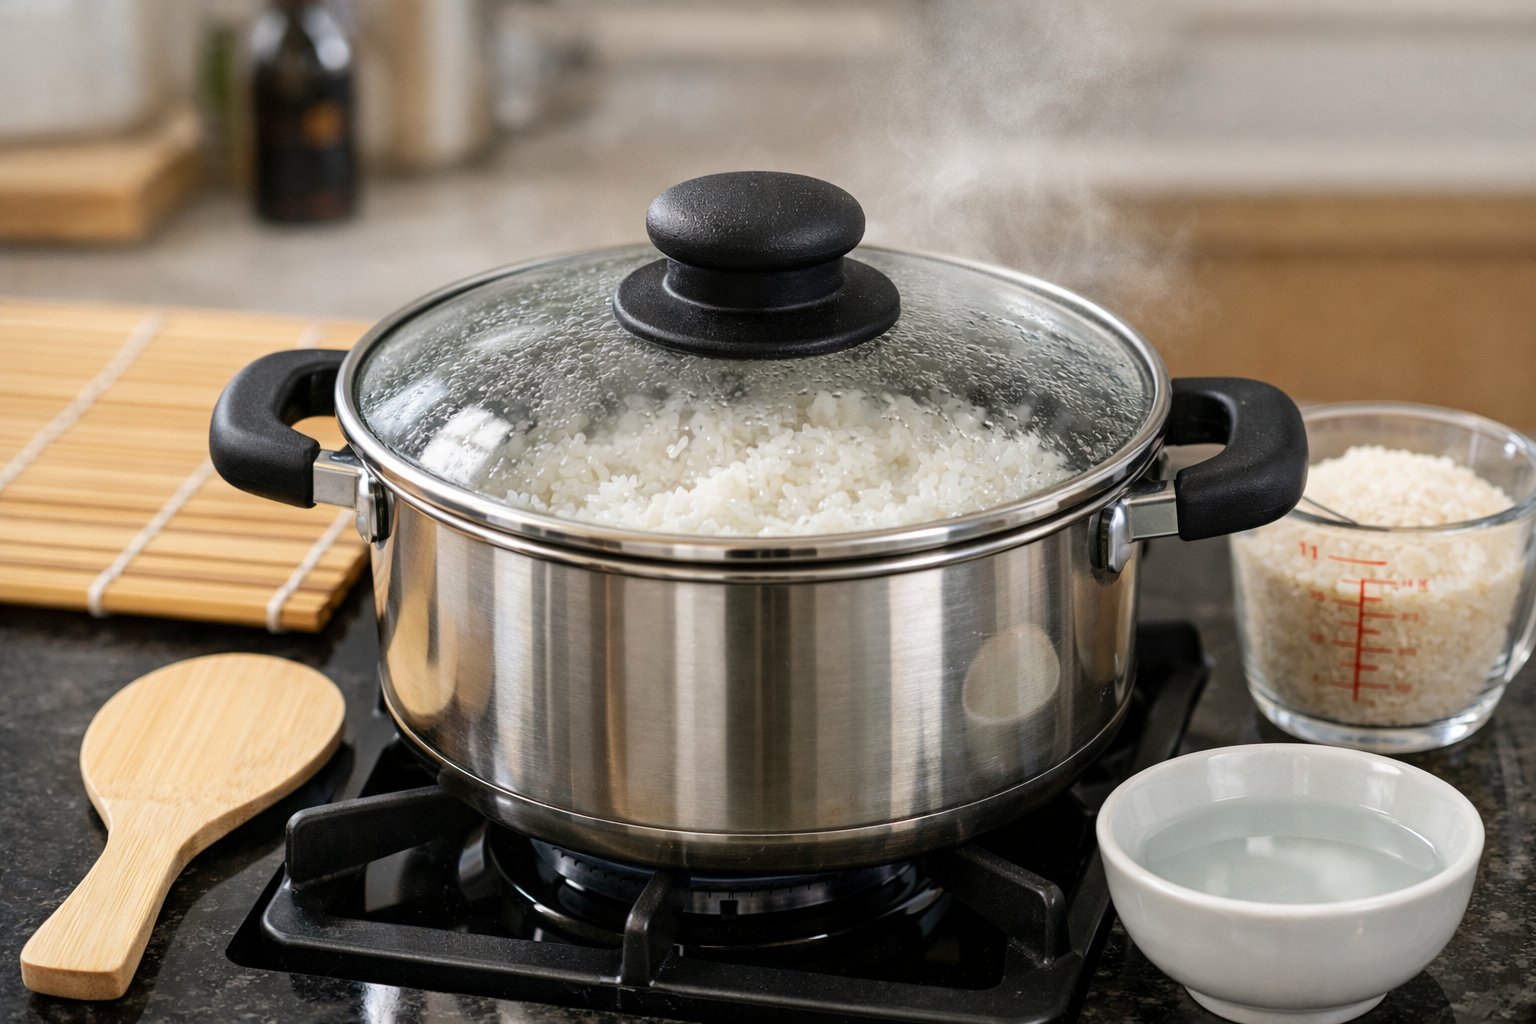
Boiling, Simmering, and Resting
Add the rinsed rice and water to your pot. Bring it to a full boil over medium heat, uncovered.
This usually takes 5-7 minutes.
Once it’s boiling, drop the heat to low and cover with the lid. Don’t peek—lifting the lid lets out steam and messes up the texture.
Let it simmer for 20 minutes. You should hear gentle bubbling, not a wild boil.
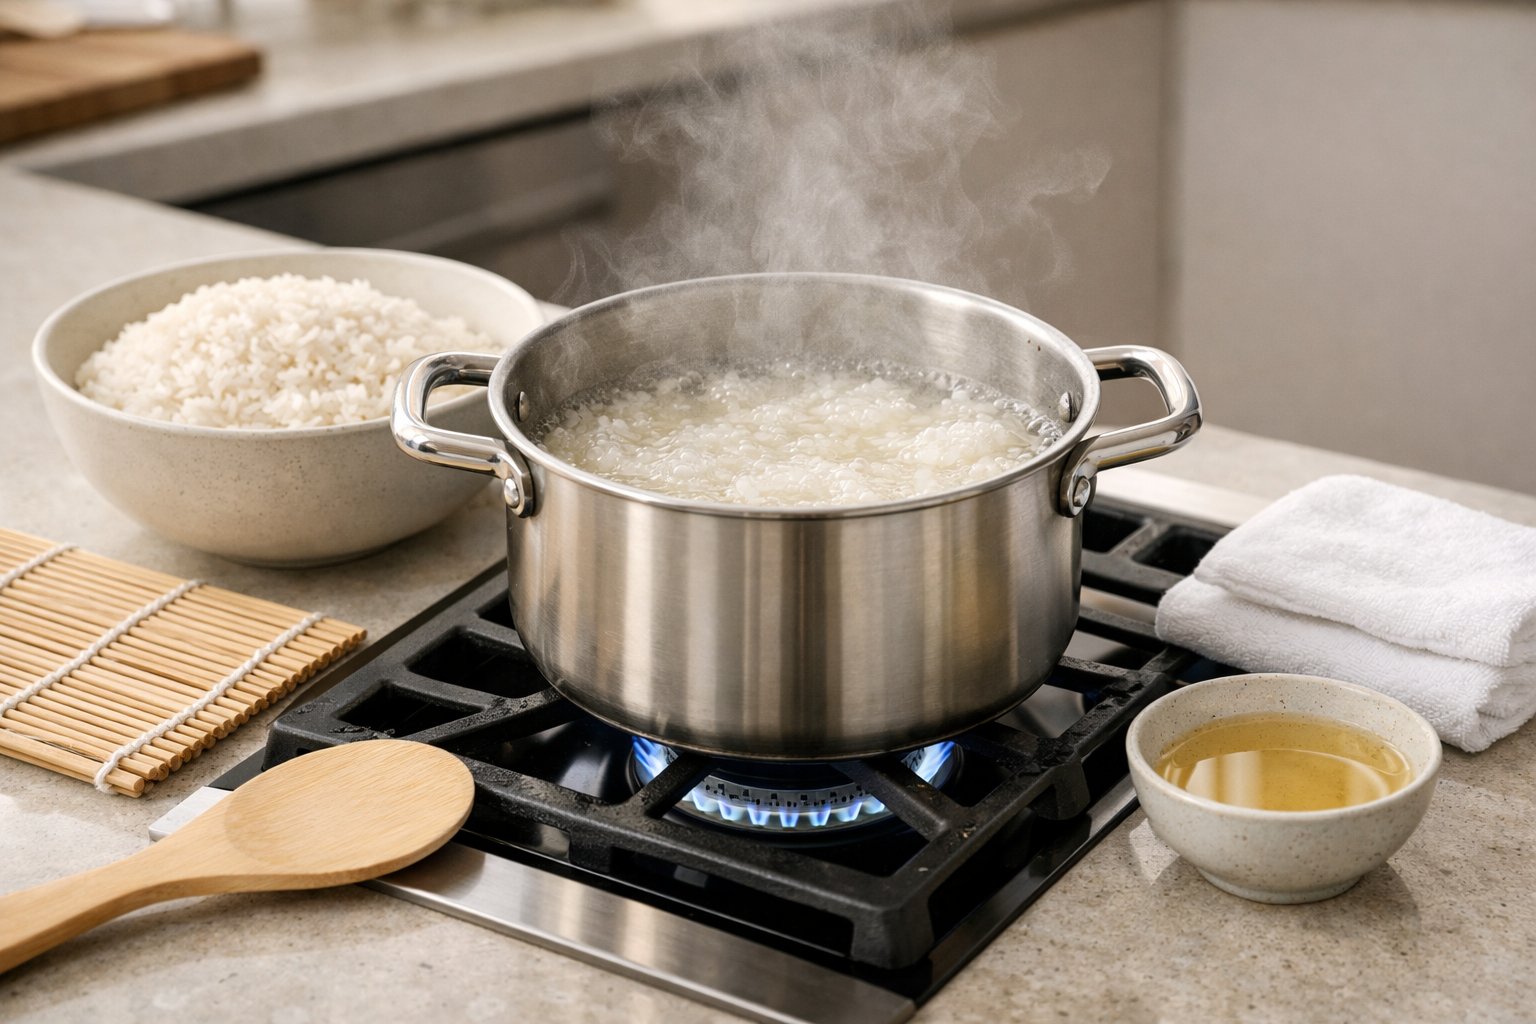
After 20 minutes, turn off the heat. Leave the lid on and let the rice rest for 10 minutes.
That rest lets the rice finish absorbing moisture and cook through.
Testing for Doneness
When it’s done, sushi rice should be tender with a tiny bit of bite. The grains should stay separate, not mushy or clumped.
Take off the lid and check the surface. It should look dry, with no water pooling.
Fluff the rice gently with a paddle or fork to check the texture.
Taste a bit. It should be soft but still hold its shape.
If it’s hard or crunchy, add 2 tablespoons of water, cover, and steam for another 5 minutes on low.
If it’s too wet or sticky, leave the lid off for a couple of minutes to let moisture escape.
Now it’s ready for seasoning with your vinegar mix.
Alternative: Cooking Sushi Rice with a Rice Cooker
A rice cooker makes perfect sushi rice pretty much foolproof. The water-to-rice ratio is the same as stovetop, and most cookers have a sushi rice setting.
Measuring Water and Rice
Stick with a 1:1 water to rice ratio in the rice cooker. A standard Japanese rice cup holds 150g of uncooked rice, which needs about 175ml of water.
Most cookers come with measuring cups and water level marks inside.
Rinse your rice really well before putting it in the cooker. Use a fine-mesh sieve and wash under cold water three times until it runs clearer.
Once rinsed, add the rice and measured water to the cooker bowl. If you like, toss in a piece of kombu or a splash of sake for extra flavor.
Specific Steps for Rice Cookers
Pick the white rice or sushi rice setting. If yours doesn’t have a sushi button, the regular white rice setting works fine.
Hit start and let the machine do its thing. Don’t open the lid while it’s cooking.
When the cooker says it’s done, let the rice rest for 10 minutes with the lid closed. This helps the rice finish steaming and get the right texture.
Move the hot rice to a wide bowl or wooden sushi oke after resting. Mix in your sushi vinegar while the rice is still hot, using a gentle cutting motion with your paddle.
Fan the rice as you mix to cool it to body temperature and give it that glossy finish.
Seasoning and Finishing Sushi Rice
The seasoning step is where plain rice turns into real sumeshi, or shari. The rice vinegar blend gives sushi rice its signature sweet-tangy flavor, and cooling it right creates that lovely glossy look.
Preparing Sushi Vinegar
You only need three things for sushi rice seasoning: rice vinegar, sugar, and salt. Mix 4 tablespoons of rice vinegar with 2 tablespoons of granulated sugar and 1 teaspoon of salt in a small saucepan.
Heat everything on low, stirring until the sugar and salt dissolve. Don’t let the mixture boil—boiling just ruins the vinegar’s acidity and throws off the flavor.
Once it’s dissolved, take the pan off the heat. Let your sushi vinegar cool down to room temperature before using it.
Some people add sake or mirin for a little extra depth, but honestly, the basic three-ingredient version works great for homemade sushi rice.
Basic Sushi Vinegar Recipe:
| Ingredient | Amount |
|---|---|
| Rice vinegar | 4 tablespoons |
| Sugar | 2 tablespoons |
| Salt | 1 teaspoon |
This amount is good for about 2 cups of uncooked rice. Adjust if you’re making a bigger or smaller batch.
Mixing and Cooling Techniques
Move your hot cooked rice into a large non-metallic bowl. A wooden hangiri is traditional, but any wide, shallow bowl will do.
Spread the rice out a bit to help it cool faster. Drizzle the sushi vinegar over the rice gradually.
Use a rice paddle or wooden spoon to fold the vinegar through with gentle cutting motions. Don’t stir too hard—crushing the grains just makes them mushy.
Fan the rice as you mix. This helps it cool quickly and gives the rice a nice shine.
A hand fan, paper fan, or even a hairdryer on cool works for this. Fanning also helps the vinegar soak into every grain.
Cover the rice with a damp cloth between uses to keep it from drying out.
Achieving the Right Texture and Shine
Properly seasoned sushi rice should be a little sticky, but each grain stays separate. The rice should hold together when you shape it, but it shouldn’t clump into a solid ball.
Try forming a small ball in your hand—it should stick together without falling apart or feeling too wet.
The surface needs to look glossy, not wet or dry. That shine comes from the vinegar and the fanning.
If your rice looks dull, you probably didn’t add enough vinegar or skipped the fanning step.
Use the rice at room temperature or just a bit warm. Cold rice gets hard and is tough to work with.
Rice that’s too hot will make the nori wrapper soggy, which is just not what you want.
Storing and Reusing Cooked Sushi Rice
Cooked sushi rice needs the right cooling and storage to keep its texture. You can reheat it later if you use the right methods.
Cooling and Airtight Storage
Let your cooked sushi rice cool to room temperature before storing it. Spread it in a shallow bowl for about 10–15 minutes until it stops steaming.
This keeps condensation from forming inside your container. Once it’s cool, move the rice to an airtight container.
A good container keeps the rice from drying out and blocks other smells in your fridge. Store cooked sushi rice in the fridge for up to 3 days.
Sushi rice doesn’t last as long as regular rice because of its high starch and the vinegar. You can freeze sushi rice for longer, but it might change the texture a bit.
Use freezer-safe bags or containers and eat it within a month for the best results.
Reheating Methods
To reheat, put refrigerated sushi rice in the microwave with a damp paper towel over the bowl. Heat it in 30-second bursts and stir between rounds until it’s at room temp or slightly warm.
You can also steam it for 2–3 minutes to bring back some moisture. Add a splash of water so the grains don’t dry out.
Don’t overheat the rice—it’ll just turn mushy and lose its nice, sticky texture. You want it just warm enough to roll or shape.
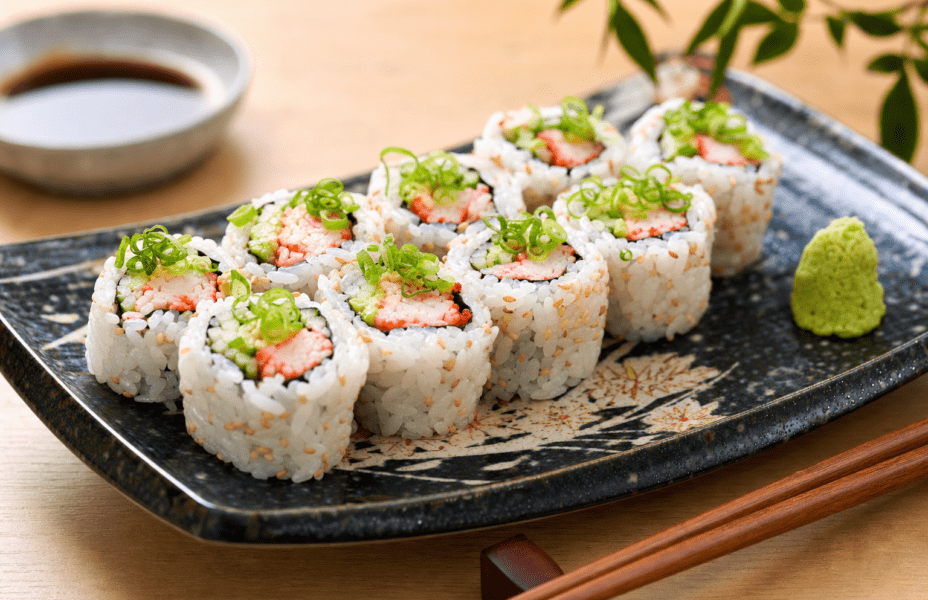
Using Sushi Rice in Sushi-Making
Once your sushi rice has cooled to room temperature, you can start shaping it for sushi. Its sticky texture helps it hold together, and the vinegar seasoning brings out the classic flavor that goes so well with fish and veggies.
Preparing Rice for Sushi Rolls
Wet your hands with water mixed with a little rice vinegar before handling the rice. This keeps the grains from sticking to your fingers.
Use about 80–100 grams of rice for a standard nori sheet. Spread the rice evenly across the nori, leaving a 2-centimeter border at the top.
Press gently to make a layer about 5–7 millimeters thick. Don’t press too hard—you want a light, airy texture, not a dense roll.
Keep a bowl of vinegar-water nearby to re-wet your hands as you go. Place your fillings in a line across the lower third of the rice-covered nori.
Don’t overfill, or the nori will tear and rolling will get messy.
Makizushi, Temaki, and Other Sushi Styles
Makizushi means rolling the nori and rice around fillings with a bamboo mat. Apply even pressure as you roll to make a tight cylinder.
For inside-out rolls, put the rice on the outside and the nori inside. Temaki are cone-shaped hand rolls you make without a mat.
Hold a half sheet of nori in your palm, add a little rice to one corner, then pile your fillings diagonally. Fold the bottom corner up and roll into a cone.
The rice helps seal the cone together. For nigiri, you don’t need nori.
Shape small oval mounds of rice with wet hands, then press a slice of fish or another topping on top.
Tips, Troubleshooting, and Common Mistakes
Making great sushi rice takes some attention to detail. The water ratio, rinsing, and cooling all matter if you want that perfect sticky yet firm texture.
Avoiding Common Pitfalls
A common mistake is using the wrong water-to-rice ratio. For short-grain sushi rice, you want a 1:1.25 ratio—one cup of rice to 1.25 cups of water.
If you use too much water, you get mushy rice that won’t hold its shape. Skipping the rinsing step is another big error.
You should rinse your rice three or four times until the water runs clear. This gets rid of extra starch that would make your rice gluey.
Don’t lift the lid while cooking. Let the rice simmer and rest with the lid on the whole time.
Opening it early lets out steam and gives you unevenly cooked grains with hard centers.
Fine-Tuning Texture and Flavour
If your sushi rice is too firm, you probably didn’t use enough water or cooked it too briefly. Next time, add two more tablespoons of water per cup of rice and let it rest for the full 10 minutes after cooking.
If it’s mushy, you used too much water or cooked it too long. Cut back on water and keep the heat at a gentle simmer, not a boil.
Add the seasoning mixture (rice vinegar, sugar, salt) while the rice is still warm but not hot. Hot rice absorbs the seasoning unevenly, and cold rice won’t soak it up at all.
Fan the rice as you fold in the seasoning to get that glossy look and the right temperature for perfect sushi rice.
Frequently Asked Questions
Getting the water ratio right is key, along with rinsing and using short-grain Japanese rice. Cooking time is usually 15 to 20 minutes.
You’ll know the rice is ready when it’s tender, sticky, and has a slight sheen.
What is the correct water-to-rice ratio for sushi rice?
The usual ratio is 1:1—one cup of water for each cup of rice. Some people go with 1.1:1 or 1.2:1 for softer rice.
Measure carefully using proper cups. Too much water makes the rice mushy, too little leaves it hard.
How long should sushi rice be cooked to achieve perfect texture?
Simmer the rice for 15 to 20 minutes after it starts boiling. Once the water’s gone, take the pot off the heat and let it rest, covered, for 10 minutes.
This lets the rice steam and finish cooking. The grains turn tender and sticky, not mushy.
Can sushi rice be prepared in a rice cooker, and if so, how?
Rice cookers work really well for sushi rice. Use the same water-to-rice ratio as you would on the stove.
Rinse the rice, add it to the cooker with water, and pick the white rice setting if there’s a choice. When it’s done, let it rest for 10 minutes before opening.
What are the steps for rinsing sushi rice before cooking?
Put your measured rice in a big bowl and fill it with cold water. Swirl the rice around with your hand until the water looks cloudy.
Pour off the water and repeat this two or three more times. The water should be mostly clear at the end.
Drain the rice fully in a mesh strainer before cooking.
Is there a specific type of rice that should be used for sushi?
Short-grain Japanese rice is what you want for sushi. Look for Koshihikari, Nishiki, or Calrose rice.
Long-grain rice just doesn’t work—the starch content isn’t right. Short-grain rice has more amylopectin starch, which creates the sticky texture that sushi needs.
How can one tell when sushi rice is perfectly cooked and ready for seasoning?
The rice is ready when it’s absorbed all the water and feels tender when you bite into it. You’ll notice a slight sheen on the surface.
It should stick together, but not turn mushy. Try lifting some rice with a paddle—each grain should stay separate, yet still cling together.
If you spot any water left in the pot, just pop the lid back on and give it a bit more time.