Good sushi rice is what separates restaurant-quality rolls from those sad, homemade ones that just don’t hit the mark. Sushi rice is seasoned with a balanced mix of rice vinegar, sugar, and salt, aiming for that signature sweet-sour kick that makes sushi rice taste, well, like sushi rice.
The word “sushi” literally means “sour rice,” which should tell you how crucial the seasoning is here.
Lots of home cooks either skip the seasoning or mess up the ratios—ending up with bland, crumbly rice. Timing and technique matter just as much as the ingredients, honestly.
The rice has to be hot when you add the seasoning, otherwise it won’t soak up all those flavors.
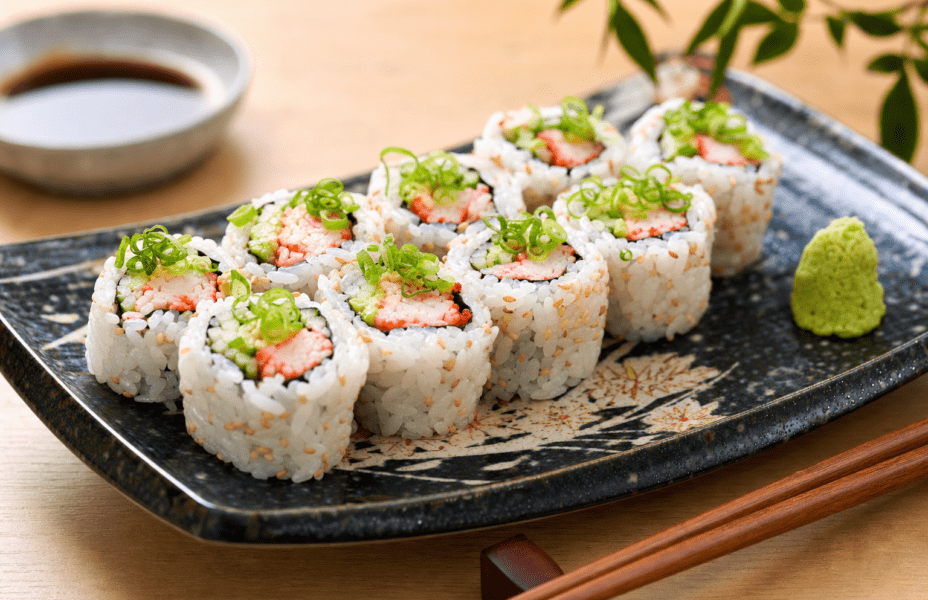
Once you nail sushi rice, you can go way beyond basic rolls. Use it for nigiri, hand rolls, poke bowls, rice balls—the works.
Mastering the basics gives you a solid foundation for making real-deal sushi at home.
Key Takeaways
- Mix rice vinegar, sugar, and salt in the right ratios for authentic sushi rice seasoning
- Add the seasoning to hot rice and use gentle cutting motions—don’t smash the grains
- Use short-grain Japanese rice and filtered water for best results
Choosing the Right Sushi Rice

It all starts with the rice. Short-grain sushi rice gives you the sticky texture you need for proper sushi, and good brands really do make a difference.
Short-Grain Sushi Rice Benefits
Short-grain rice packs in more starch than other types, which is what makes it sticky enough to hold together.
The grains are nearly round, about 4-5 millimeters long—a compact size that helps them cling together once cooked.
Why short-grain rice rules:
- More starch = better stickiness
- Soaks up seasoning like a champ
- Holds its shape after cooling
- Delivers that classic sushi flavor
When you cook it right, short-grain sushi rice turns out tender but not mushy. The grains stick together but don’t become a blob.
Selecting High-Quality Brands
Brand matters. Look for packages labeled “sushi rice” or “short-grain Japanese rice.”
Some solid picks:
- Koshihikari – Top-notch flavor, classic Japanese option
- Calrose – California-grown, works well
- Nishiki – Decent medium-grade choice
- Tamaki Gold – Another high-quality California option
Check the packaging date—it really does matter. Fresher rice cooks up better and tastes way nicer than stuff that’s been sitting around forever.
Go for rice with even grain size and color. Skip bags with lots of broken grains or dust at the bottom—usually a red flag for old or low-quality rice.
Once opened, stash your rice in an airtight container. Keeps it fresh and keeps bugs out.
Why Regular Rice Won’t Work
Long-grain rice like jasmine or basmati just doesn’t cut it. Those stay fluffy and separate, which is the opposite of what you want here.
They don’t have enough starch, so your sushi rice won’t stick together. That means your rolls will fall apart and the texture will feel off.
Problems with the wrong rice:
- Grains won’t stick
- Rolls fall apart
- Texture feels weird
- Doesn’t soak up seasoning right
Medium-grain is a bit better than long-grain, but still not ideal. It’s just not sticky enough for legit sushi rice.
Honestly, just get the short-grain stuff. It makes all the difference.
Essential Ingredients for Sushi Rice Seasoning

Classic sushi rice seasoning only needs three things: rice vinegar, sugar, and salt. If you want to get fancy, you can add kombu or even a splash of mirin.
Rice Vinegar Selection
Rice vinegar is the backbone of the seasoning. Go for mild Japanese rice vinegar—trust me, it’s worth it.
Light vs. Dark Rice Vinegar:
- Light rice vinegar is super versatile
- Dark akazu vinegar brings depth but costs more
- Stick with light vinegar for home use
Pick unseasoned rice vinegar—no extra sugar or salt. Marukan Organic is a good bet if you can find it.
Skip white vinegar or apple cider vinegar. Those just taste harsh and overpower the rice. Japanese rice vinegar strikes the right balance.
Give it a sniff—it should smell clean and slightly sweet. If it smells funky or looks cloudy, toss it.
Proper Use of Sugar and Salt
Sugar and salt balance out the vinegar’s bite. Usually, it’s about two parts sugar to one part salt.
Basic measurements:
- 4 tablespoons rice vinegar
- 2-3 tablespoons sugar
- 1-2 teaspoons salt
Regular white sugar dissolves easily and keeps the color nice. Brown sugar can make the rice look muddy, so I’d avoid it.
Use kosher or sea salt—Diamond Crystal is a favorite because it dissolves fast. Table salt with iodine can make things taste metallic.
Warm up the vinegar mix gently so the sugar and salt dissolve. That way, it blends into the rice better.
If you like your rice sweeter, add a bit more sugar. No shame in tweaking it to your taste.
Incorporating Kombu and Umami Enhancers
Kombu (dried kelp) brings a subtle umami kick. It’s what separates good sushi rice from just okay seasoned rice.
Soak a piece of kombu in the vinegar mixture for about a day before using it. That pulls out all the good flavors.
Kombu perks:
- Mineral-rich ocean flavor
- Extra savory notes
- Traditional touch
Use a 2-inch square of kombu per half cup of vinegar. Make sure it’s covered by the liquid.
Take the kombu out before you add the seasoning to the rice. The liquid should have all the umami you need.
Look for kombu that’s dark green with white powdery spots. If it’s brown or smells fishy, skip it.
Optional Additions: Mirin and Dashi
Mirin and dashi aren’t required, but they can level up your sushi rice. Mirin adds a gentle sweetness and helps keep the grains separate.
Just a teaspoon or two per batch is enough. Go for hon-mirin if you want the real deal, not the fake cooking wine stuff.
Dashi adds another layer of umami. Stir in a tablespoon of cooled dashi to the vinegar mix if you’re feeling ambitious. Use light dashi so you don’t mess with the rice color.
When to use these extras:
- Mirin for extra fancy rice
- Dashi for that restaurant vibe
- Both for special occasions or when you want to impress
They do take extra prep time, so maybe start simple and experiment once you’ve got the basics down.
Traditional sushi rice really only needs vinegar, sugar, salt, and maybe kombu. Anything else should just enhance, not drown out, the rice’s natural flavor.
Step-by-Step Sushi Rice Preparation

Getting great sushi rice means paying attention to every step—washing, cooking, seasoning, and cooling. Each one matters for that sticky texture and balanced flavor.
Rinsing and Soaking the Rice
First, rinse the rice at least three times. Put it in a big bowl, add cold water, and swirl it around with your hands.
The water gets cloudy from the starch. Pour it out, add fresh water, and repeat until the water’s pretty much clear.
After rinsing, soak the rice for one to two hours. This helps it cook evenly and get the right texture.
Test a grain by splitting it with your fingernail—if it’s easy, you’re good. Drain the rice in a fine mesh strainer before cooking.
Cooking with a Rice Cooker or Stovetop
Rice Cooker: Put the drained rice in your cooker with an equal amount of water. Toss in a small piece of kombu if you want.
Let the cooker do its thing. Once it’s done, let the rice sit for ten minutes before opening the lid.
Stovetop: Add the rice and water to a heavy pot with a tight lid—same 1:1 ratio.
Bring it to a boil on medium, then turn it down low and simmer for 18 minutes.
Turn off the heat and let it sit, still covered, for another ten minutes. Don’t peek!
Combining the Seasoning
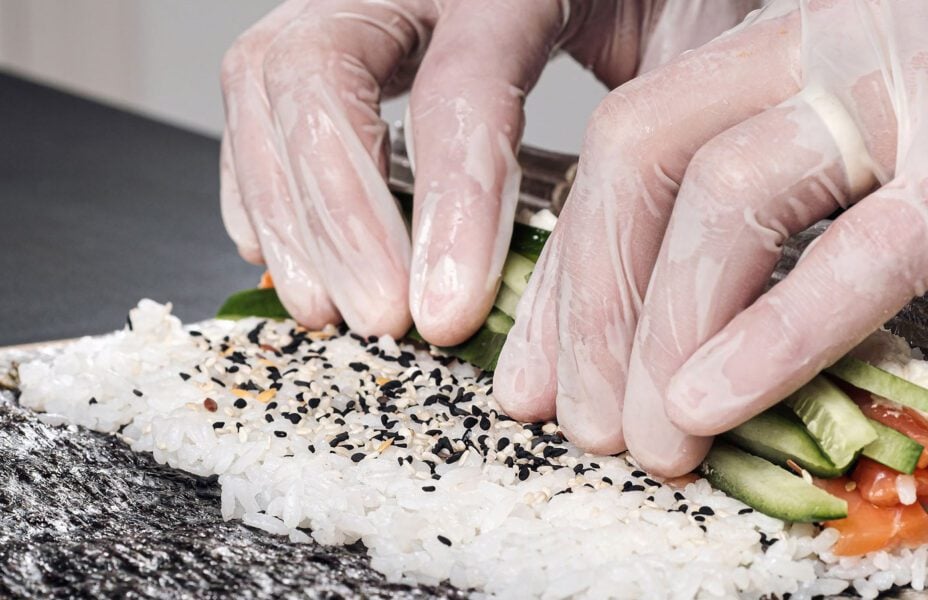
Add the seasoning while the rice is still hot. Move the cooked rice to a big bowl or a wooden hangiri if you’ve got one.
Drizzle the seasoning evenly over the rice—start with about one tablespoon per cup of cooked rice.
Use a rice paddle (or big spatula) to gently fold the seasoning in. Make cutting motions, not stirring, so you don’t smash the grains.
Technique tips:
- Slice through the rice with the paddle
- Fold from the bottom up
- Taste and tweak the seasoning if you want
Work fast but gently to spread the seasoning everywhere.
Cooling and Resting the Rice
Cool the seasoned rice as quickly as you can—it helps it stay shiny and keeps the texture right.
Fan the rice while you keep folding it. This usually takes around ten minutes.
It’s ready when it’s room temp and glossy. Each grain should be sticky but still distinct.
Cover the rice with a damp towel until you’re ready to use it. Don’t put it in the fridge—it’ll turn hard.
Try to use the rice within a few hours. It should still feel a little warm when you start making sushi.
Techniques for Mixing and Seasoning Sushi Rice
The real secret to great sushi rice is in the technique and timing. Move quickly while the rice is hot, use gentle cutting motions, and keep an eye on the temperature throughout.
Traditional Wooden Tools: Hangiri and Rice Paddle
The hangiri is a shallow wooden bowl that absorbs excess moisture from hot rice. We always soak it in warm water for a few minutes first.
This keeps the rice from sticking to the wood. After soaking, we pour out the water and wipe the hangiri with a clean towel.
The damp wood makes mixing easier and keeps the rice from getting too wet. A wooden rice paddle is the go-to tool for mixing.
We hold the paddle at about a 45-degree angle when adding the vinegar mixture. It helps to keep the paddle moist the whole time.
Key paddle techniques:
- Use cutting motions, not stirring
- Keep the paddle damp but not dripping
- Work with gentle, sweeping strokes
- Break up clumps without mashing grains
The wood slowly absorbs heat and moisture. That helps us control the rice temperature as we mix.
Fanning for Gloss and Texture
Fanning the rice as we mix gives it that classic glossy look. We use a fan or even a piece of cardboard to move air over the rice.
This cooling step really matters for the final texture. Fanning cools the rice to body temperature pretty quickly and helps create that shiny finish you see in good sushi rice.
We fan while cutting through the rice with the paddle. It takes a bit of coordination, honestly—one hand fans, the other mixes.
The rice should go from steaming hot to just warm in about 10 minutes. We stop fanning when it feels warm but not hot to the touch.
Letting it get to room temperature? Not a great idea. The rice just won’t soak up flavors as well if it cools too much.
Achieving Even Seasoning
We pour the vinegar mixture slowly and evenly over the rice, usually over the paddle for better distribution. Dumping it all in one spot just doesn’t work.
Mixing sequence:
- Flatten rice into an even layer
- Add vinegar mixture over paddle
- Cut through rice with sweeping motions
- Push rice to one side of container
- Flip small portions to the empty side
- Break up any remaining clumps
We try to work quickly but gently. Hot rice absorbs seasoning best, and we want every grain coated but not soggy.
After the first mix, we let the rice rest for about 4 minutes. Then we flip portions from top to bottom to spread the umami flavor evenly.
Mistakes to Avoid When Mixing
Never stir the rice in circles. That breaks the grains and turns the texture mushy. Cutting and folding is the way to go.
Pouring in too much liquid at once causes uneven seasoning—some grains get drenched, others stay plain. We add the vinegar gradually.
If we move too slowly, the rice cools before it can soak up flavors. Hot rice just takes on seasoning better, so we try to finish mixing in 10-15 minutes.
Common errors to watch for:
- Pressing down hard on the rice while mixing
- Using metal tools that damage the grains
- Letting the rice sit too long before seasoning
- Adding cold seasoning to hot rice
Once the seasoning’s in, we avoid over-mixing. Too much handling makes the rice sticky and heavy instead of light and fluffy.
Common Issues and Expert Troubleshooting
Seasoning sushi rice well takes a bit of balance and precision. Most problems come down to flavor imbalances, texture issues, or just keeping things consistent from start to finish.
Balancing Flavors: Too Sour or Too Bland
Nailing the flavor balance is key for authentic sushi rice. If the rice comes out too sour, we cut back on the vinegar in our mix.
The usual ratio is 3 tablespoons rice vinegar, 2 tablespoons sugar, and 1 teaspoon salt for 2 cups of cooked rice. If it’s too sour, try 2.5 tablespoons vinegar instead.
For bland rice, we check if the seasoning mix is warm enough when we add it. Cold seasoning just doesn’t soak in well.
Common fixes for bland rice:
- Increase salt by half a teaspoon
- Add seasoning while rice is still hot
- Mix more thoroughly with cutting motions
Tasting the seasoning before adding it helps too. It should taste balanced on its own.
Sticky Versus Mushy Texture
Perfect sushi rice should be sticky enough to hold together, but not mushy. Sticky rice is great for rolls; mushy rice just falls apart.
Too much stickiness usually means we used too much water or didn’t rinse off enough starch before cooking. The rice-to-water ratio should be about 1:1 for most short-grain rice.
Mushy rice happens if we overcook it or use too much heat. We cook on medium-low and leave the lid alone while it’s cooking.
Quick texture fixes:
- For sticky rice: Spread it on a sheet pan so it cools faster
- For mushy rice: Use it for hand rolls instead of tight rolls
- For dry rice: Sprinkle in a bit of warm water while mixing
Preserving the Perfect Consistency
Keeping seasoned sushi rice consistent means mixing and storing it right. We add seasoning gradually while the rice is about 100-110°F.
Using a wooden spoon or rice paddle stops us from crushing the grains. We always use cutting and folding motions, never circles.
Temperature really matters. Rice that’s too hot soaks up seasoning too fast, and rice that’s too cool won’t absorb it at all.
Storage tips for consistency:
- Cover with a damp cloth at room temp
- Use within 4 hours for the best texture
- Never refrigerate seasoned sushi rice
- Keep it away from drafts and direct air
Fanning the rice as we mix helps it cool down just right and gives it that nice shine.
Variations and Advanced Tips for Seasoned Sushi Rice
Different regions and chefs have their own ways of seasoning sushi rice. Modern tricks let us tweak the classic recipe and sometimes save a bit of time in the kitchen.
Regional Differences in Sushi Rice
Sushi rice changes from region to region in Japan. Tokyo-style uses a lighter vinegar mix with more sugar, while Osaka goes for more vinegar and less sweetness.
Some places add mirin for a subtle sweetness and extra depth. Usually, we use about a tablespoon of mirin per cup of rice.
Akazu vinegar makes for a different flavor. It’s a red vinegar from sake lees and pairs well with silver-skinned fish like mackerel.
In Kyoto, they often add a little dashi to the rice. The dashi boosts umami without making the rice taste fishy. Two tablespoons of cooled dashi per cup of rice does the trick.
Preparing Sushi Rice Seasoning in Advance
We can mix up sushi rice seasoning a week ahead. Just combine rice vinegar, sugar, and salt in a jar and stash it in the fridge.
Adding a piece of kombu to the vinegar mix adds more flavor. Let it sit for 24 hours, then pull the kombu out before using.
Make larger batches if you want to save time. Double or triple the recipe—it keeps well if stored right.
We heat the vinegar mixture gently to dissolve the sugar, then cool it before refrigerating. Some chefs warm the seasoning before adding it to hot rice for better absorption.
Creative Enhancements and Modern Tweaks
Citrus additions like yuzu juice or lemon zest (about a teaspoon per cup of seasoning) can brighten the flavor, especially for summer rolls.
A dash of roasted sesame oil adds nuttiness, but just a drop or two per cup of rice. Too much and you’ll drown out the fish.
We sometimes infuse vinegar with herbs like shiso leaves or ginger. Just strain them out after a day.
Different sugars change things up, too. Brown sugar brings earthiness, honey adds floral notes. If you use liquid sweeteners, cut the amount by half.
Some chefs even add sake—one tablespoon per cup of rice—for more complexity. Good sake makes a difference here.
Frequently Asked Questions
People ask a lot about ratios, storage, and technique for seasoned sushi rice. Getting the mixing process and ingredients right makes a huge difference in the final texture.
What is the proper ratio of vinegar, sugar, and salt for seasoning sushi rice?
The standard mix is 4 tablespoons rice vinegar, 2 tablespoons sugar, and 1 teaspoon salt. That will season about 4 cups of cooked rice.
We use about 1 tablespoon of the seasoning per cup of rice, but honestly, it’s best to taste as you go and tweak to your liking.
This ratio gives a nice balance of sour, sweet, and salty. You can scale it up or down as needed.
Can sushi rice seasoning be made in advance and how should it be stored?
We can make the seasoning ahead and keep it at room temperature. Once prepared, it doesn’t really need refrigeration.
To prep in advance, we heat vinegar, sugar, and salt together until dissolved, then let it cool before storing.
We store the cooled mix in a sealed container. It keeps well and is handy to have around.
What is the process for incorporating the seasoning into the sushi rice without making it mushy?
We season the rice while it’s still hot for the best results. Right after cooking, we transfer it to a big bowl.
We sprinkle the seasoning evenly over the hot rice with a rice paddle, then use a cutting and folding motion to mix it in gently.
The trick is to “cut” through the rice, not stir it. Folding keeps the grains intact and avoids mushiness. Cooling the rice quickly after seasoning keeps that nice shine.
Are there any alternatives to using sugar in sushi rice seasoning for dietary concerns?
We can swap white sugar for brown sugar with no problem—just use the same amount. Both work in the classic mix.
If you’re avoiding refined sugar, try honey or maple syrup. Since they’re liquids, you might need to adjust the ratios a bit.
Start with less and taste as you go. The goal is to keep the sweet note that balances the vinegar and salt.
How does the type of rice used affect the seasoning process for sushi rice?
Japanese short-grain rice is the only real choice here. It has the right starch to get sticky and hold the seasoning.
The “sushi rice” in stores is just Japanese short-grain rice. It only becomes sushi rice after we add the vinegar mix.
Long-grain varieties don’t cut it—they’re not sticky or chewy enough. You really need the texture from short-grain rice for sushi.
What are the common mistakes to avoid when seasoning sushi rice for optimal flavor?
Seasoning rice that’s already cooled down? That’s a big one to avoid. You want to get the seasoning in while the rice is still hot so it actually soaks up all those flavors.
Some folks just stir the rice, but that really doesn’t work out. Use a gentle cutting and folding motion instead, or you’ll end up with a weird, mushy mess.
It’s tempting to just toss salt and sugar straight onto the rice, but don’t. Always dissolve them in the vinegar first, or you’ll get clumps and uneven flavor—nobody wants that.